
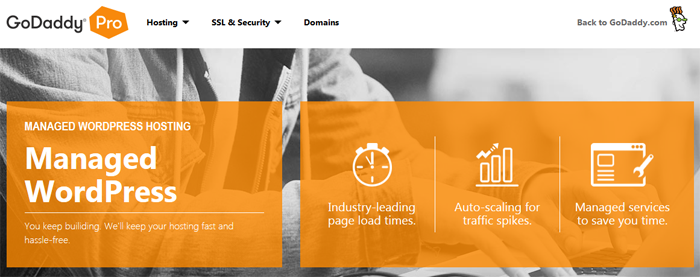
If you’re looking for managed WordPress hosting, keep in mind there is a distinct difference between starting a new WP site with a web host as opposed to transferring an existing one. I was reminded of that recently when I attempted to test out some managed WordPress hosting plans from various companies. I actually spent about four days trying to get a site online at one hosting company. However, I found the process of transferring a WordPress site to be quick and easy at GoDaddy with their Managed Hosting plan.
You may have read both good and bad things about GoDaddy’s web hosting. But my experiences with them have always been positive, so I thought I’d test out their Managed WP Plan. Once you place your order at GoDaddy, you’re prompted to begin the setup process.
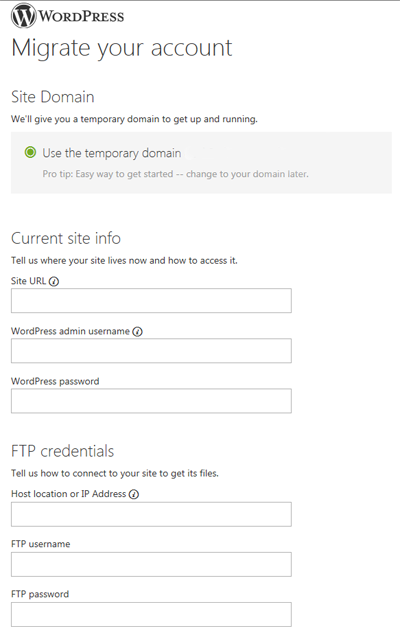
You are then given the choice of creating a new website or migrating your existing WordPress site. Since I needed to transfer a site I already have up and running, I chose that option.
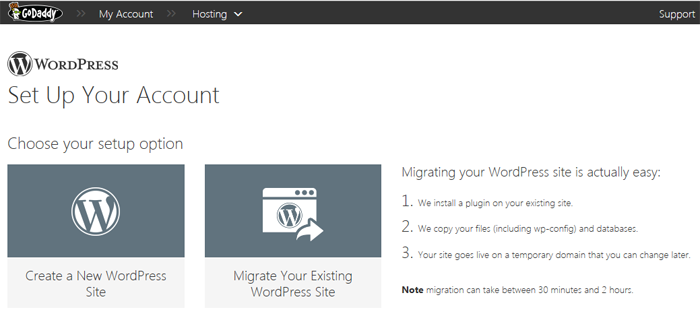
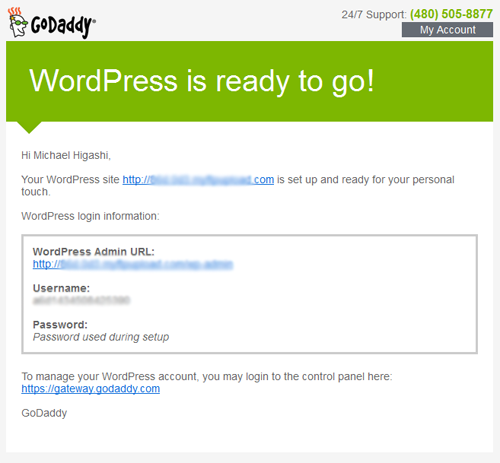
To begin the migration process, you need to enter your WordPress information (site URL, admin username, password) and your FTP credentials (host location, FTP username, FTP password). GoDaddy will then transfer/copy your existing WordPress site to a temporary URL.
The estimated time for the migration process is between 30 minutes and 2 hours. In my case, it took about 45 minutes to complete. You are notified by email when your site is ready. The email notification you receive will contain the temporary URL to your site along with a link to your WordPress admin dashboard. The WordPress username and password to your site remain the same.
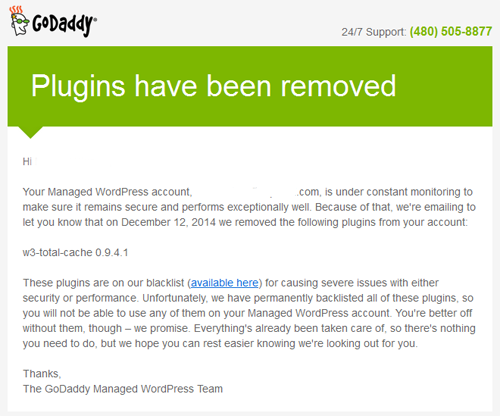
Be aware that like WP Engine and some other managed WordPress hosts, GoDaddy has blacklisted certain plugins that are not compatible with their WordPress hosting environment. For example, in my case I was using the W3 Total Cache plugin. But since GoDaddy uses its own caching system, it was removed.
Another thing to keep in mind is that if you have added additional folders or files to your WordPress directory, you’ll need to copy those over via SFTP. For example, if you use folders for PHP redirects, you’ll need to manually copy those over.
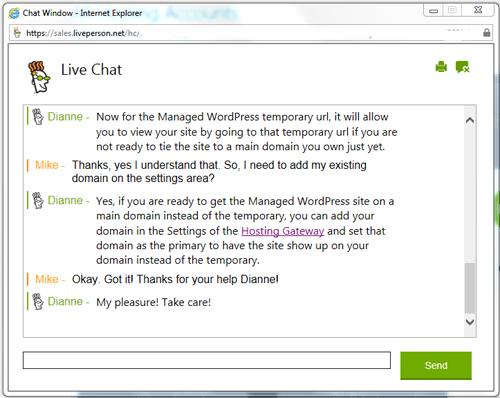
Once you’re able to view and test out your site from the temporary URL, you can then move it to your actual domain by adding your domain in the Settings area and then designating it as your Primary Domain. Besides setting your domains, the Settings area is also where you manage your backups, DNS, SFTP, databases, and staging area—where you can clone your production site to make changes and do testing before pushing the modifications out to your production environment.

GoDaddy often receives criticism, but I’ve always found their customer support to be prompt and helpful. And, they were very helpful in assisting me with the setup process. Here’s a screenshot of one of my live chat support sessions.
GoDaddy’s Managed WordPress Hosting is ideally suited for those looking to upgrade an existing WP site to a managed hosting plan.
